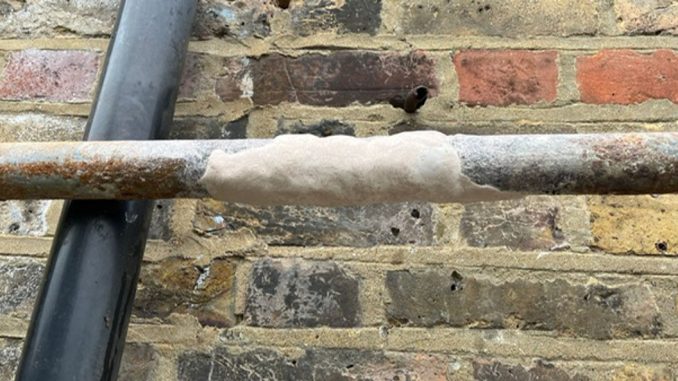
When a leaking pipe is discovered, the natural reaction is to panic. How much water damage will it cause? What will it cost to fix? Where can I find a trustworthy and reputable plumber? Our advice? Keep calm and consider using epoxy putty to repair your pipe.
Not only is epoxy putty easy-to-use, but it is also strong. Ridiculously strong. High-grade epoxy putty when applied to a leaking pipe can withstand up to 30 bar of pressure.
For context, most water suppliers in the United Kingdom send water into homes and business from the public network at 1 bar. 30 bar pressure is found in industries like oil and gas, steam distribution and specialist systems for firefighting.
If epoxy putty can withstand the pressure of a pipe network at an oil refinery in Iraq, you can be pretty confident it will handle the repair of a leaking domestic pipe.
Want to know more? Read on…
What is epoxy putty
Epoxy putty is a two-part compound that is most commonly supplied in a soft, mouldable stick. When chunks of putty are cut from this stick and kneaded by hand, the resin and hardener activate and begin curing to form a rock-hard material.
Once epoxy putty has fully hardened, it is waterproof and chemically resistant. It can even be sanded, drilled or painted.
Epoxy putty adheres to metal, PVC, concrete, GRP, clay and many other common pipe materials – making it ideal for emergency plumbing repairs.
How to use epoxy putty to repair a leaking pipe
Repairing a pipe with epoxy putty is almost as straightforward as kneading, applying over the leak and leaving harden.
We say almost because there is a little bit more to it than that. All laid out here in our six stage, step-by-step epoxy putty pipe repair guide.
1) Turn off pressure
For epoxy putty to harden properly and form a cohesive bond with the pipe it is being applied to, it needs to be left undisturbed for a brief period.
It will therefore not work on a live leak, where water is jetting out the pipe and forcing the epoxy putty away from the substrate.
Flow should be stopped before repair by locating the shut-off valve. If it is not possible to take the pipe offline, a self-amalgamating waterproof repair tape should instead be used to seal the live leak.
2) Clean and dry the pipe
To improve adhesion between the epoxy putty and pipe, the surface should be wiped with a clean cloth to remove dirt and grease. It should then be dried as much as possible.
If it is not possible to dry the pipe or it is located underwater, there are epoxy putties with specialist formulations which allow them to bond and cure to wet surfaces.
Lightly sanding or abrading the area around the leak will further improve adhesion by giving the epoxy putty a rough surface to lock onto.
3) Mix the epoxy putty
Break off enough epoxy putty from the stick to cover the damaged section. Using gloves, knead it until it turns a uniform colour with no streaks remaining from where resin and hardener had been different.
If you are using a two-part epoxy putty where the resin and hardener are kept separate rather than a stick, measure out accurate portions of Part A and Part B based on the instructed mix ratio and knead together.
Just like with an epoxy putty stick, successful mixing is indicated when the resin and hardener have blended into one.
4) Apply the epoxy putty to pipe needing repair
Whilst the putty is still soft, press it firmly over the leak. It should be moulded so that it overlaps the damaged area by around 30mm on all sides.
If you are working with a fast-setting putty with a work time of around five minutes, you will need to work quickly to apply it before it cures off.
Slow-setting epoxy putties are available with work times of up to two hours. These offer longer to handle the putty, which can be useful in complex repairs requiring careful application or in warmer environments where temperature accelerates curing.
5) Allow the putty to cure
A fast-setting epoxy putty will typically achieve a functional cure in one hour. For slow-setting putty, a functional cure can be reached in anywhere between eight and 24 hours.
Always check the manufacturer instructions for exact cure time for the epoxy putty you are using. Do not turn the water back on until it has fully set.
6) Test the pipe repair once epoxy putty has hardened
Once the epoxy putty has cured, slowly turn the water supply back on. Inspect the repair to see if anything is leaking through the epoxy putty.
If the putty has been properly applied, it will have formed a watertight seal containing pipe content and completing the repair.

Leave a Reply